


 Dolphin
An Honest Review of Dolphin Anty Anti-Detect Browser
How to choose a good anti-detect browser for arbitrage? There are many offers on the market, and every developer praises their product. One of the popular products is Dolphin Anty. We will analyze it today. Let's see what it's capable of.
You can download the anti-detect browser on the Dolphin{anty} website. Click the "Download" button, and the system will automatically redirect you to the download page.
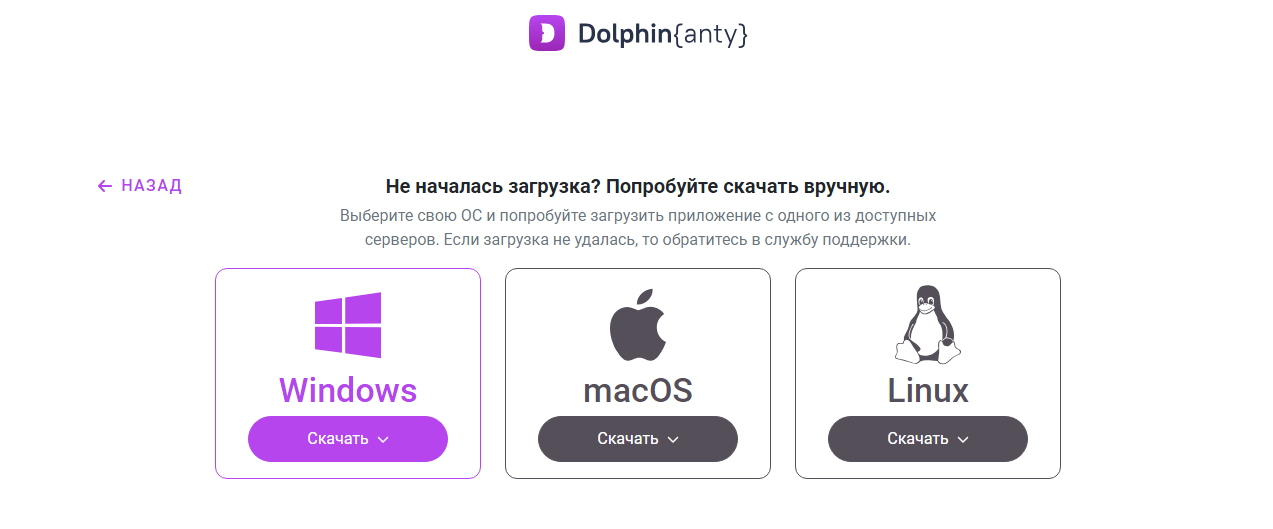
The system automatically detects your OS and starts the download. Open the installation file; the browser downloads and opens. You can register right in the window that opens. No additional files or folders are created when opening the exe file — only a launch shortcut appears.
Dolphin Anty Functionality
After registering and opening the browser, you will see 10 sections on the left.
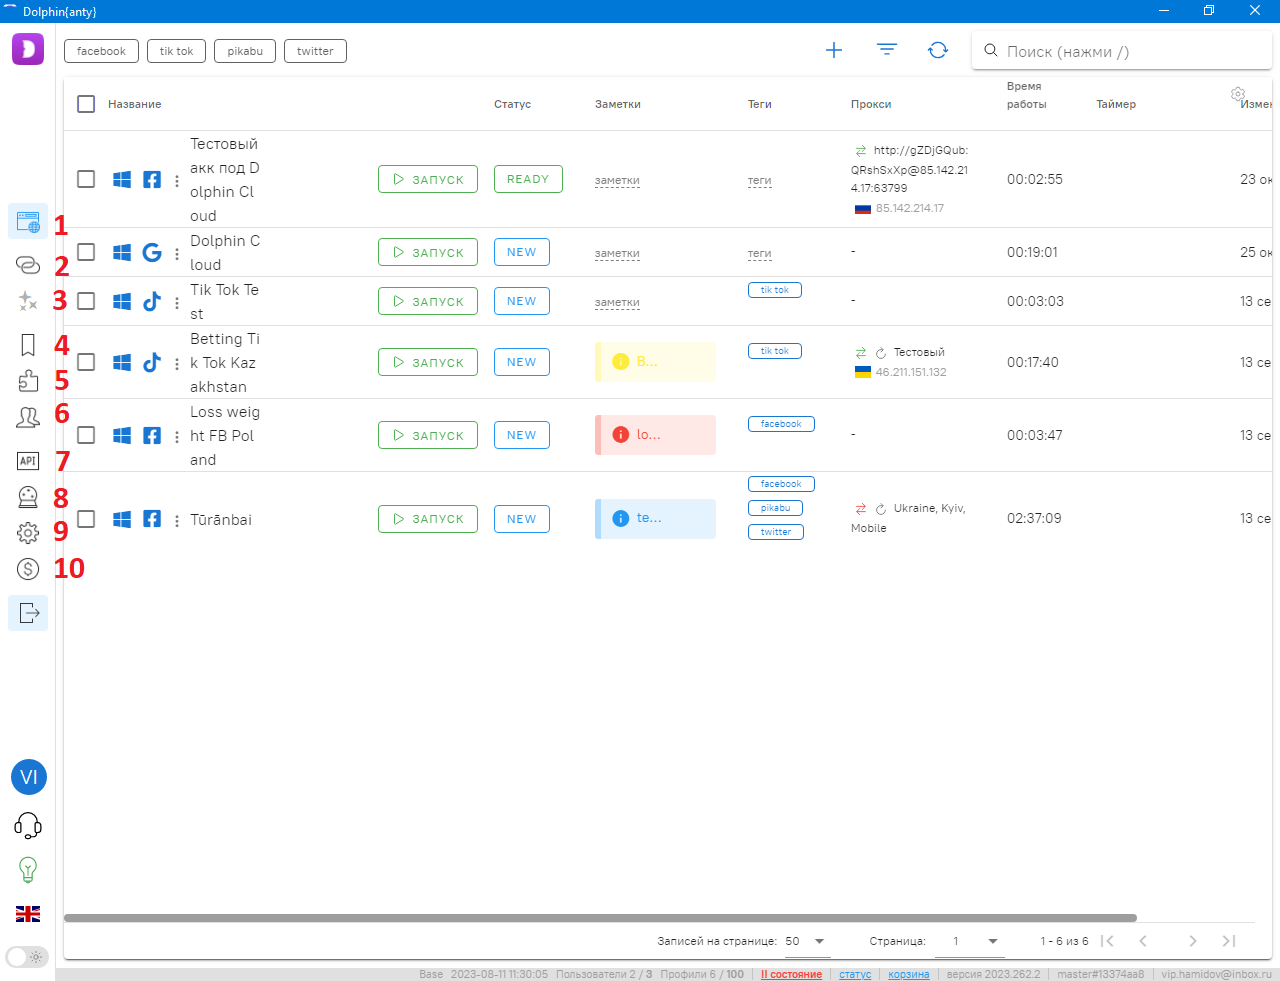
- Browser profiles.
- Proxies.
- Scenarios.
- Bookmarks.
- Extensions.
- Users.
- API.
- Automation.
- Settings.
- Payment.
Let's look at the main ones.
Browser Profiles
Here is everything related to working with browser profiles: their list, creation, tags, and filters. At the bottom, there is a trash bin for deleted profiles, where they are stored for 2 days after deletion. Next to the profiles, there is a list of options for actions with them.
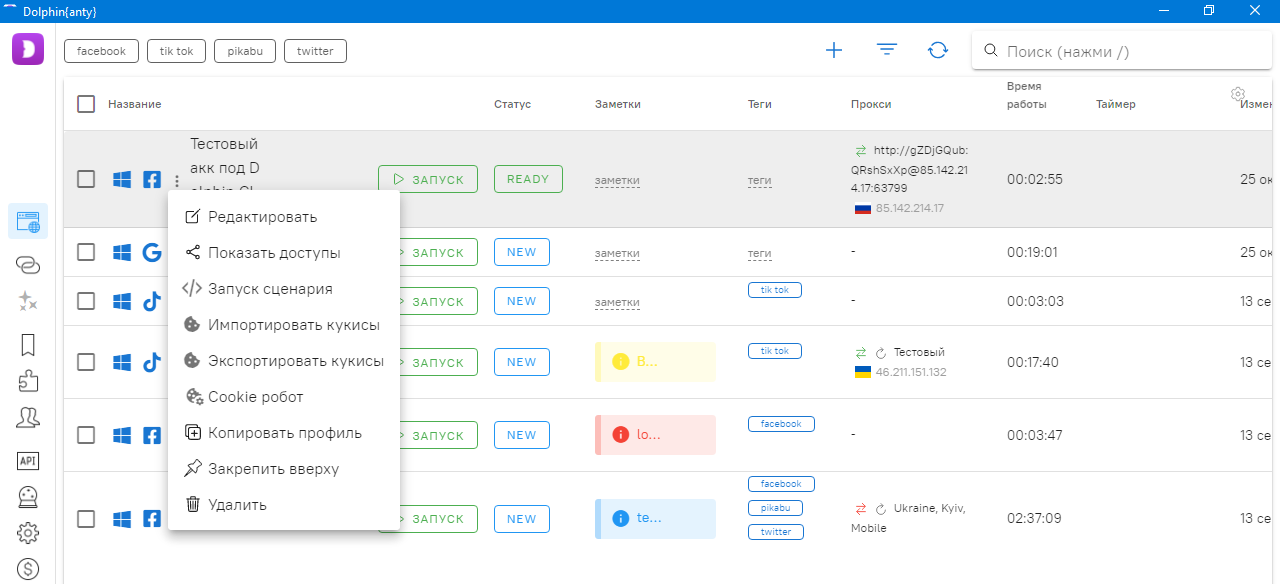
Through the dropdown menu, profiles can be:
- Edited;
- Customized for team member access;
- Run scenarios for the profile;
- Exported and imported cookies, as well as warmed up using a cookie robot;
- Copied, pinned to the top, and deleted.
To create a profile, click the corresponding button, and the profile creation form will open.
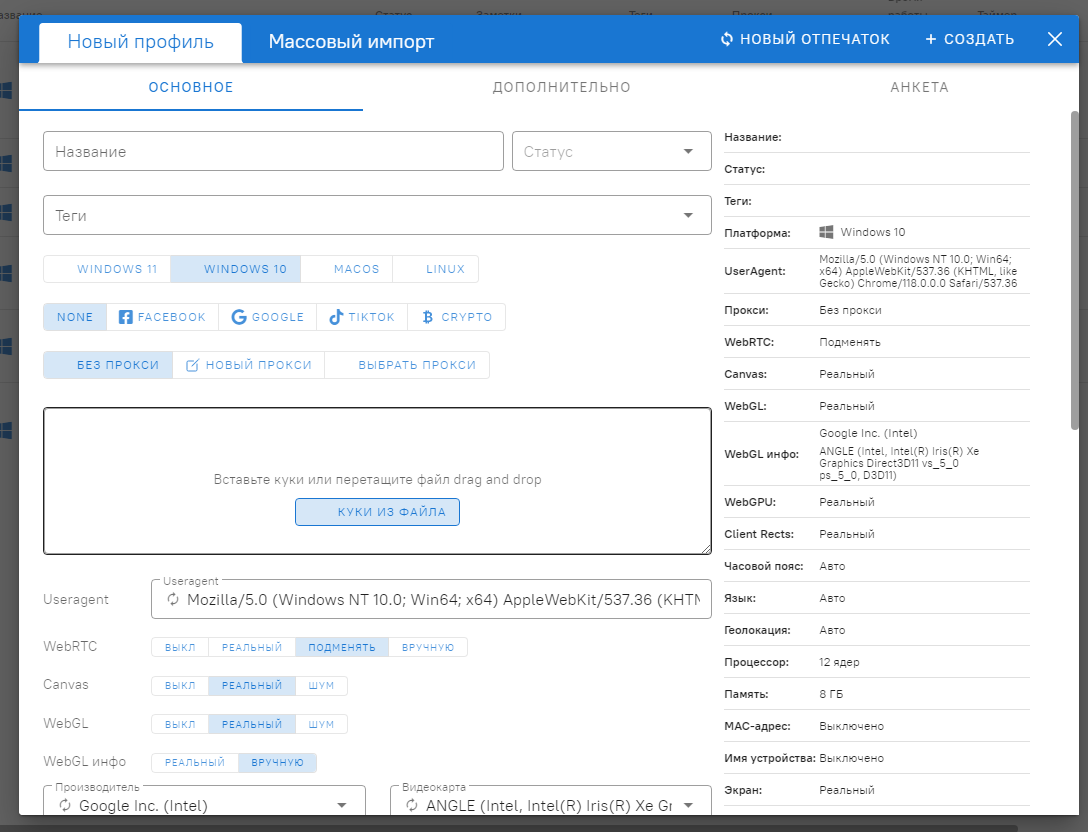
Here you can specify:
- Filtering tags by which the profile will be searched and its status. Tags and status do not affect the profile in any way and simply serve as your personal labels;
- The operating system that the browser will spoof. It is better to choose your own OS so as not to give trackers a chance to find discrepancies in your browser fingerprint;
- The platform for which the profile is being prepared. It works like this: if you choose Facebook, your choice won't affect the browser fingerprint. However, the system will automatically select the necessary start pages for working with Facebook, Google, TikTok, or crypto exchanges. In addition, if you choose an ad network, a field for adding a login and password will appear;
- Proxy, by selecting it from the list or adding a new one.
- Cookies, by inserting a file with them or copying and pasting them as text.
It's better not to touch the other parameters below. Useragent, WebGL, and WebRTC should only be configured if you understand browser fingerprints. Otherwise, Dolphin Anty will automatically set the correct values based on the selected OS and proxy.
At the bottom, you can write a note about the profile, which you will then see in the list. You can not only write the note text but also choose its color. Tags, statuses, and notes serve to help you quickly spot the profile you need in the list.
After creating the profile, we immediately test it in the Pixelscan checker. Proxies are deliberately not used here so that they do not affect the accuracy of the test.
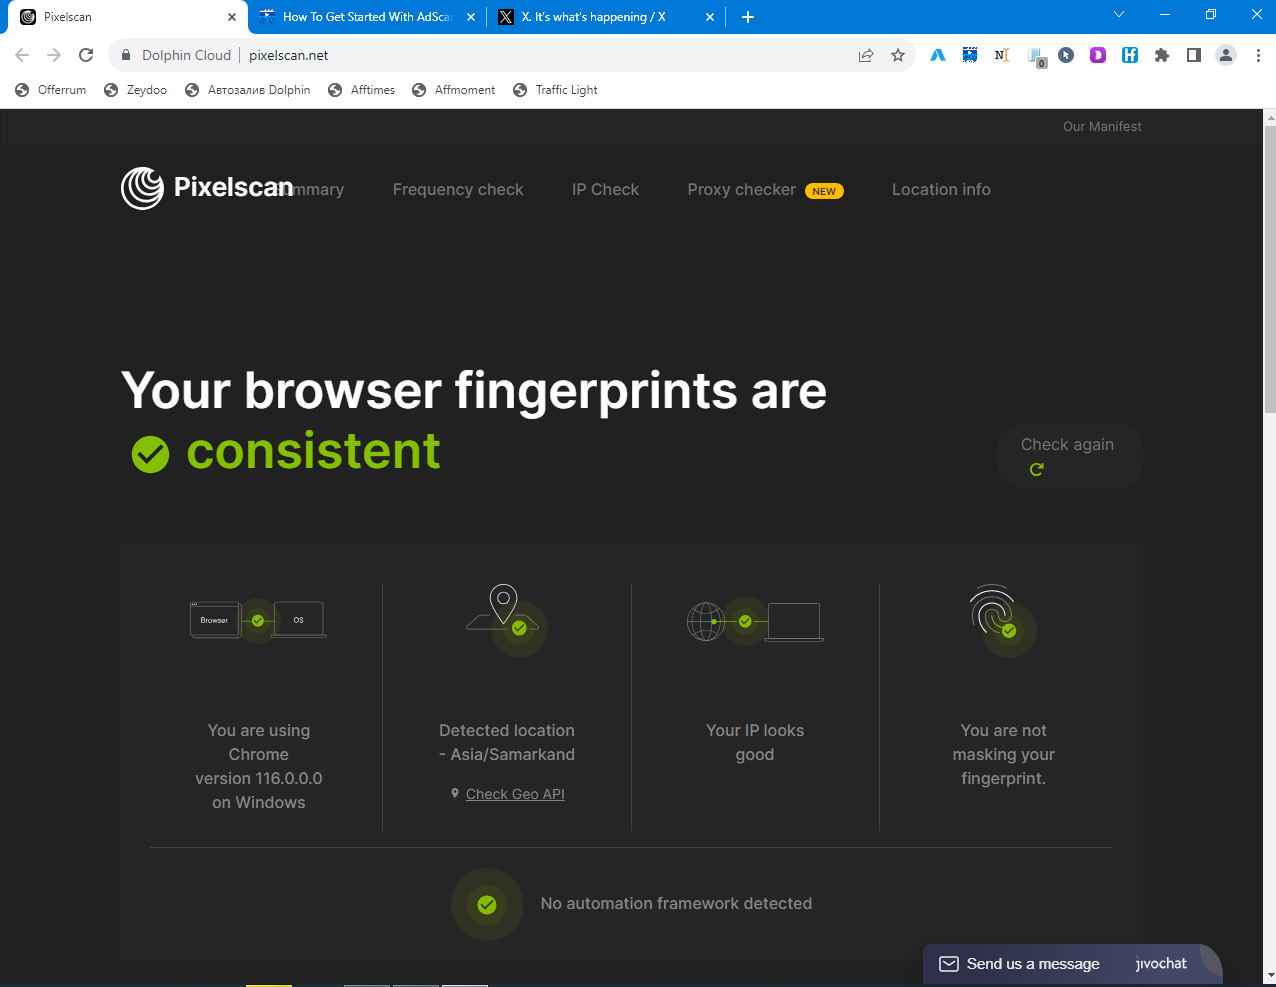
Voila! Everything passed 100%!
In the list, you can work not only with each profile individually but also with several or even all of them at the same time. To do this, check the required boxes, and a list of functions for mass actions will immediately appear at the bottom.
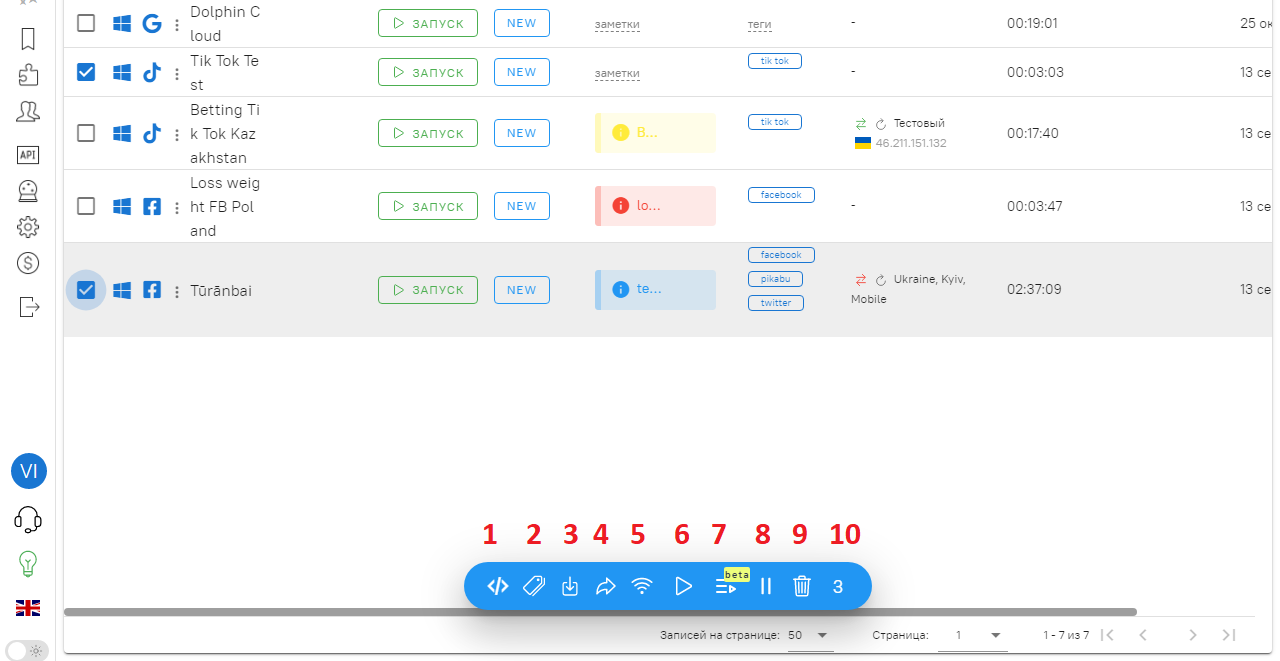
- Run a scenario for profiles.
- Add tags.
- Export cookies from them.
- Transfer to other team members.
- Change proxy.
- Start profiles.
- Start profiles via synchronizer.
- Stop profiles.
- Delete.
- Clear selection.
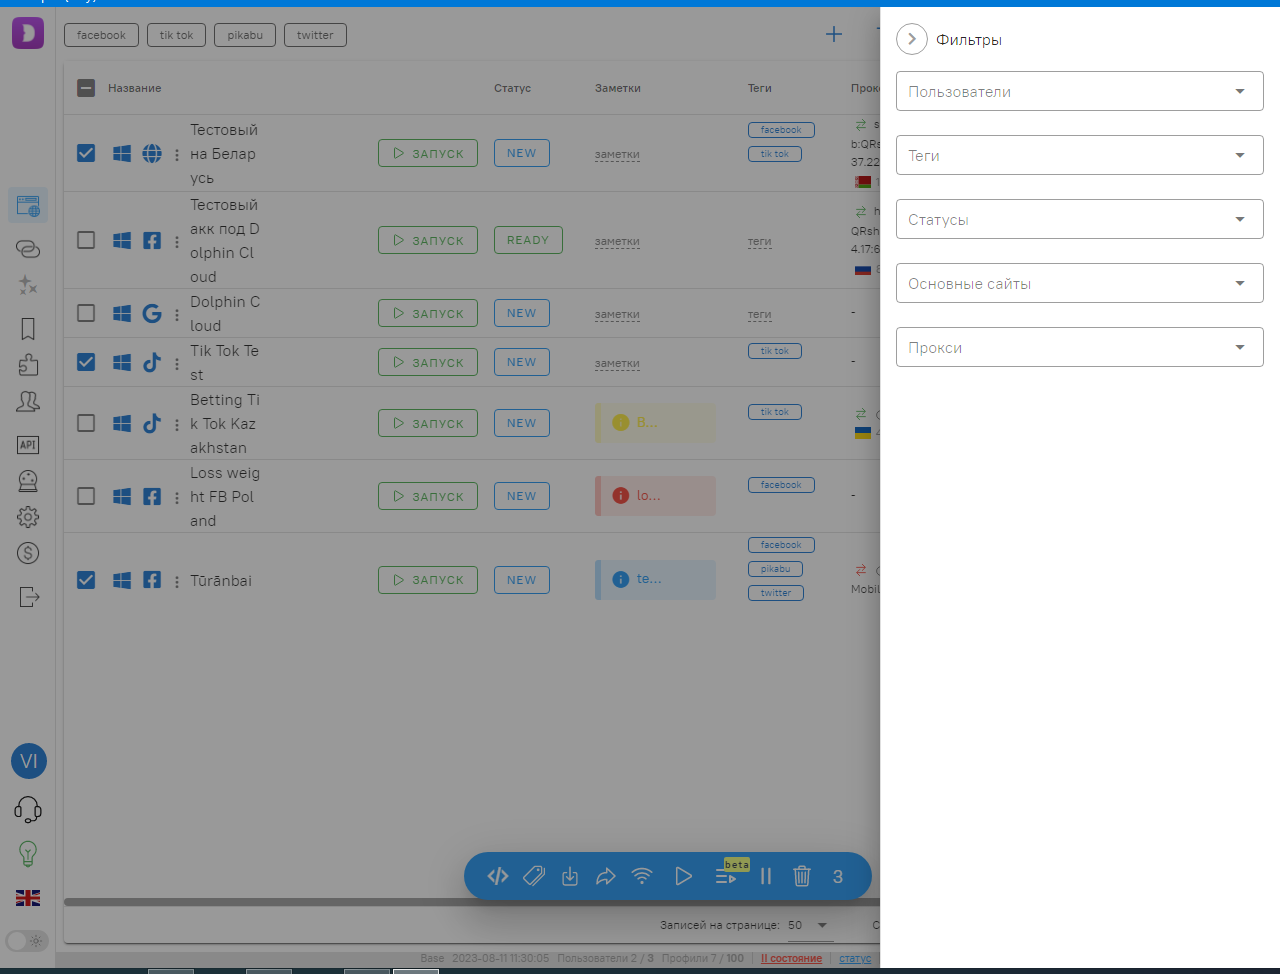
Profile filtering in Dolphin Anty.
Profiles can be filtered, leaving only the ones needed for current work. The following filters are available:
- Users. Only profiles assigned to specific users remain;
- Tags;
- Statuses;
- Main websites. If you only need profiles created for Facebook/TikTok, you select only those sites. The rest will be hidden;
- Proxies.
In the profile list, we see statuses, notes, proxies, runtime, and the date of the last modification. However, you can customize this list for yourself by adding or removing columns, as well as changing their width. There is a column settings icon in the upper right corner.
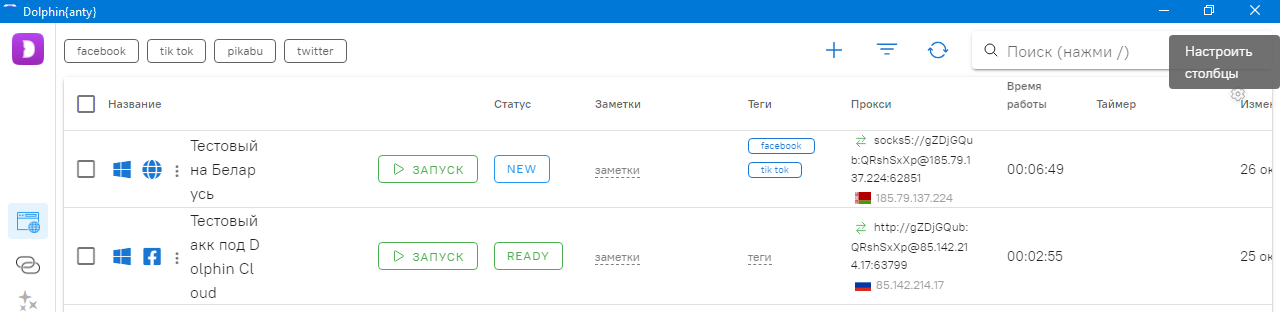
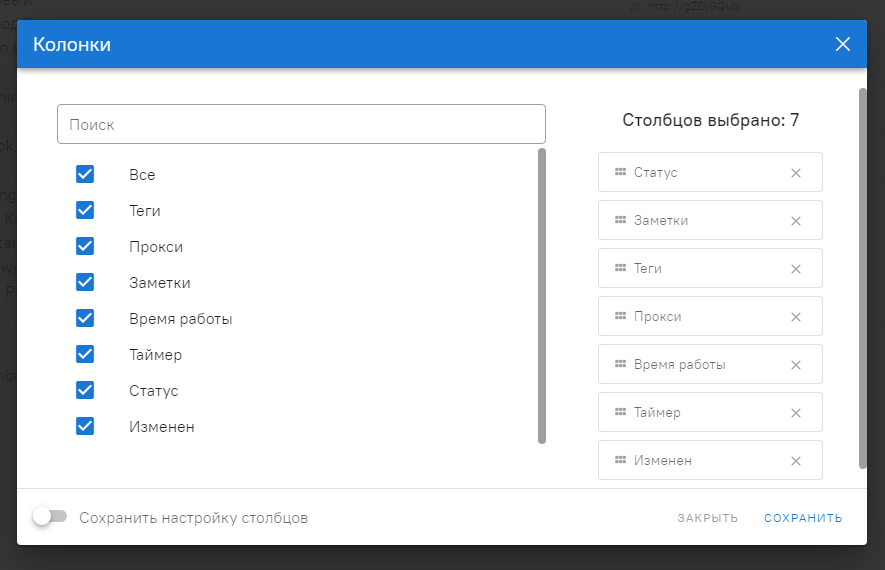
By selecting the "Save column settings" option, you can save the created configuration under a certain name. Then, instead of configuring it all over again, you can just apply it by this name.
At the very bottom, there are barely noticeable tabs: "Condition", "Status", and "Trash". Through the "Condition" tab, you can update individual components of the browser rather than the whole thing, such as proxy utilities, user-agents, or extensions.
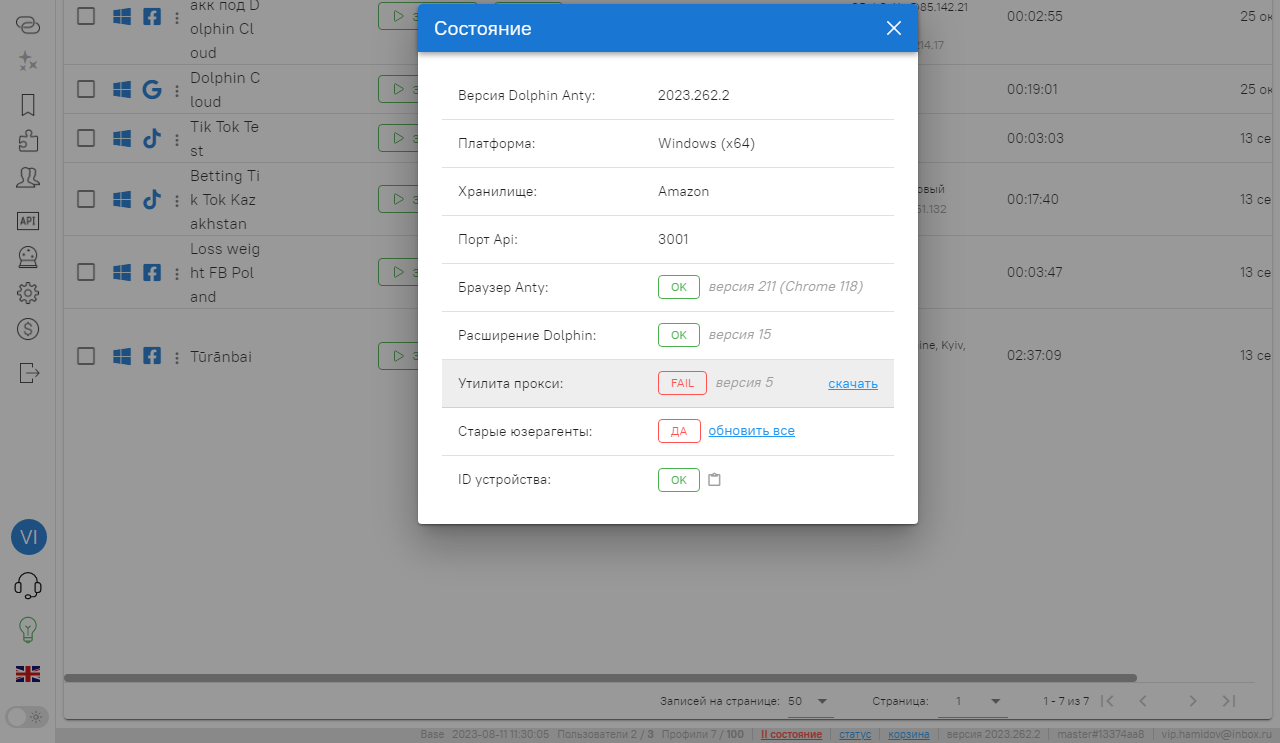
In general, if Dolphin Anty suddenly throws any errors, you should check the "Condition" tab — something might be outdated and needs to be updated. The "Status" button opens the status page and action logs in your browser, and the "Trash" allows you to access recently deleted profiles if you suddenly need to restore them.
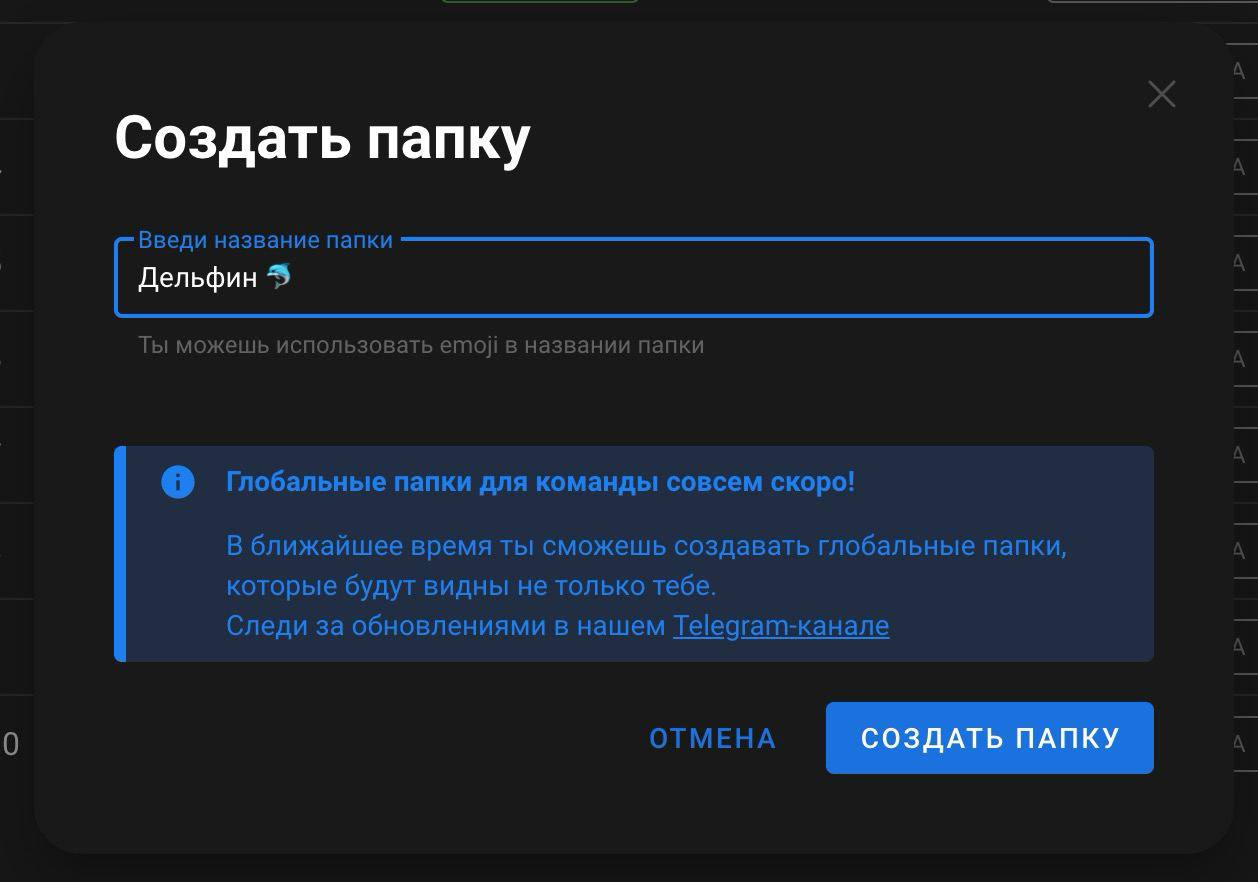
Also, the team recently released a new feature — folders. Now you can organize existing profiles into the required folders or create new ones inside the desired folder. The feature is available starting from the free plan.
Proxies
In this section, we add proxies so that later, when creating new profiles, you don't have to manually enter the port, host, login, and password of the servers.
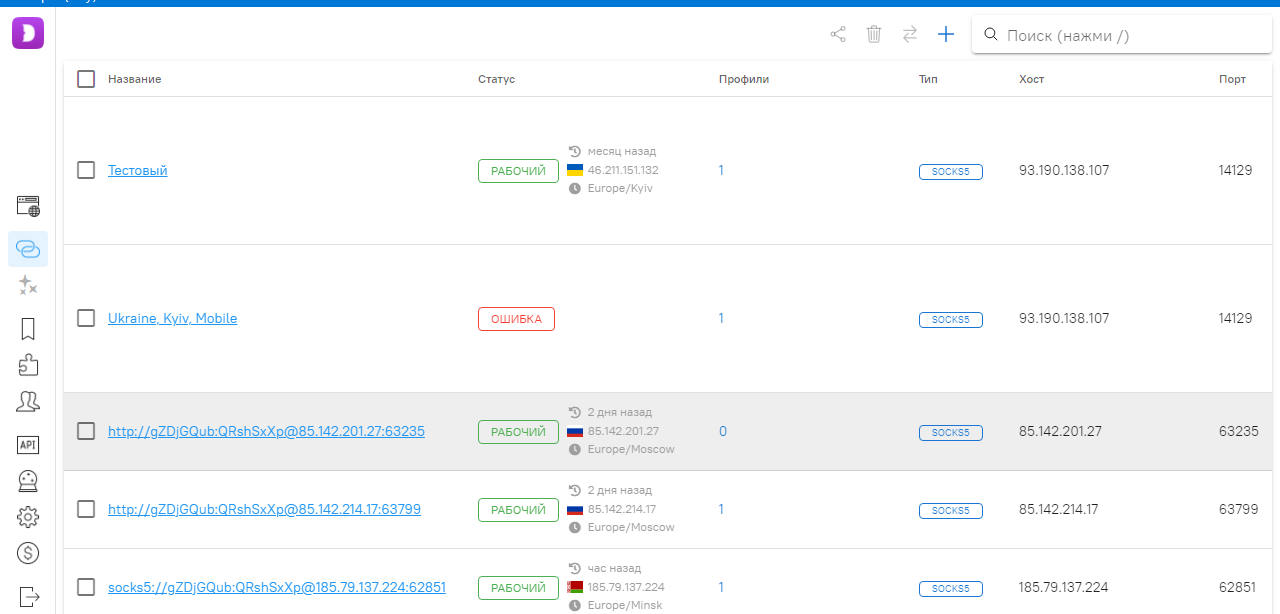
In the list, we see the status, type, host, port, login, and password, as well as the number of profiles assigned to the proxy. Clicking on the number in the corresponding column takes you to the browsers running on the selected proxy.
When adding a proxy, a form appears as shown in the screenshot below.
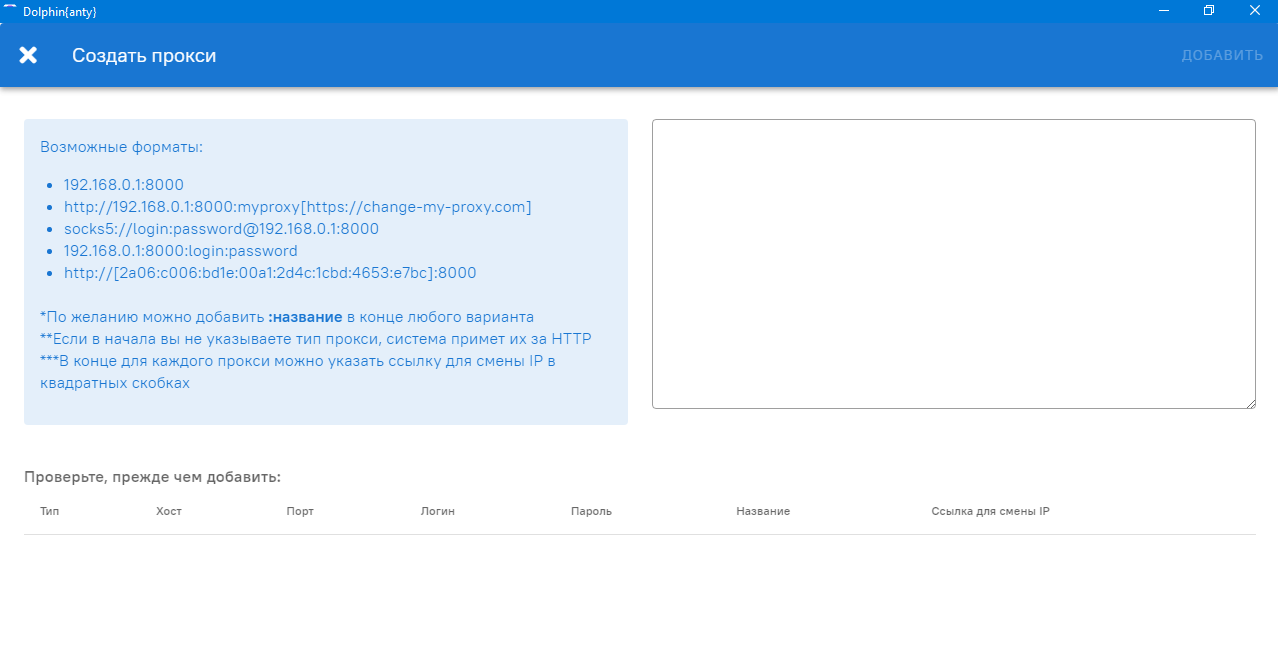
It is most convenient to use the following format:
(http or socks5)://login:[email protected]:8000[https://link-for-changing-IP.com]
The IP change link is added optionally. If you add it, you can change the IP in any profile later with just one click.
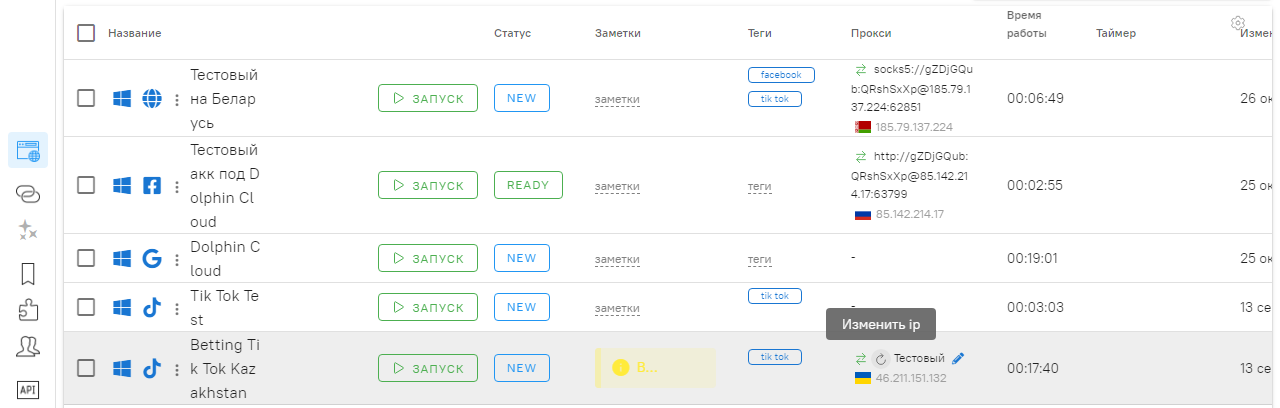
For example, in the proxies of the top two profiles, this link is missing, but in the bottom one, it is present, which is why the "Change IP" button is there. Click it, and the address will immediately change for all profiles running on this proxy. No need to log in to the provider's panel and change the IP manually.
After adding a proxy, its status will initially be "Unknown".
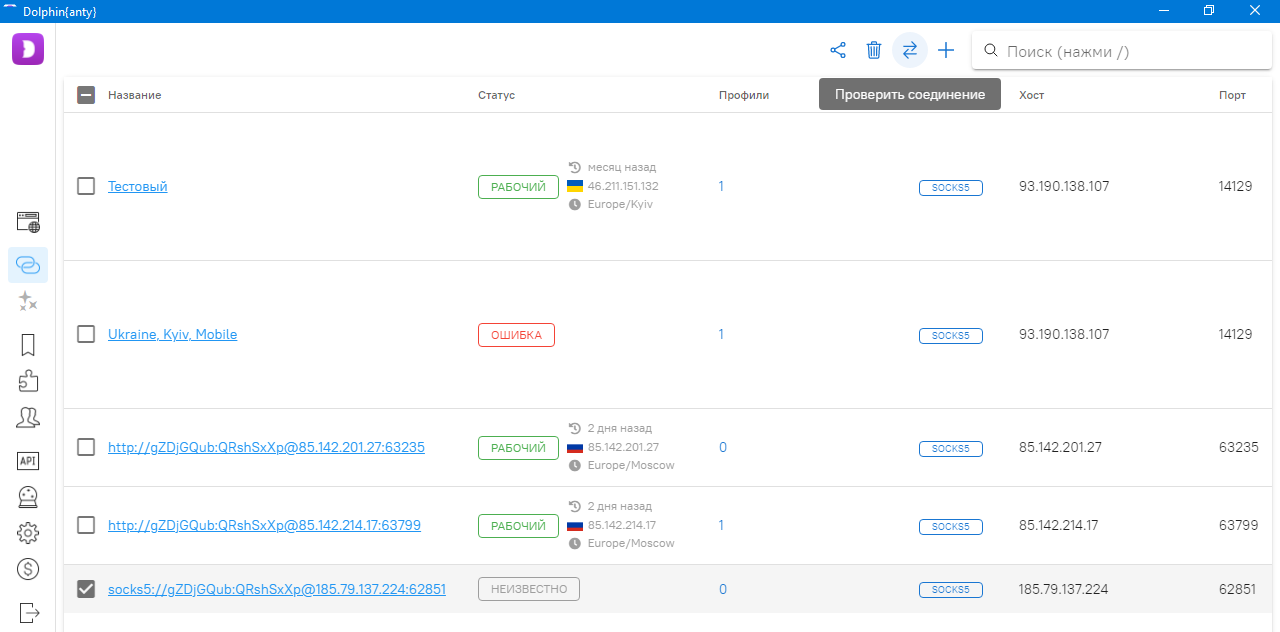
Click the "Check connection" button, and after that, the status will be either "Active" or "Error".
Using the buttons in the upper right, proxies can be deleted or shared with other members.
Scenarios
Scenarios are used for automated actions in a profile, such as farming and warming up an advertising account. At the same time, they help simulate the actions of a real person in the browser.
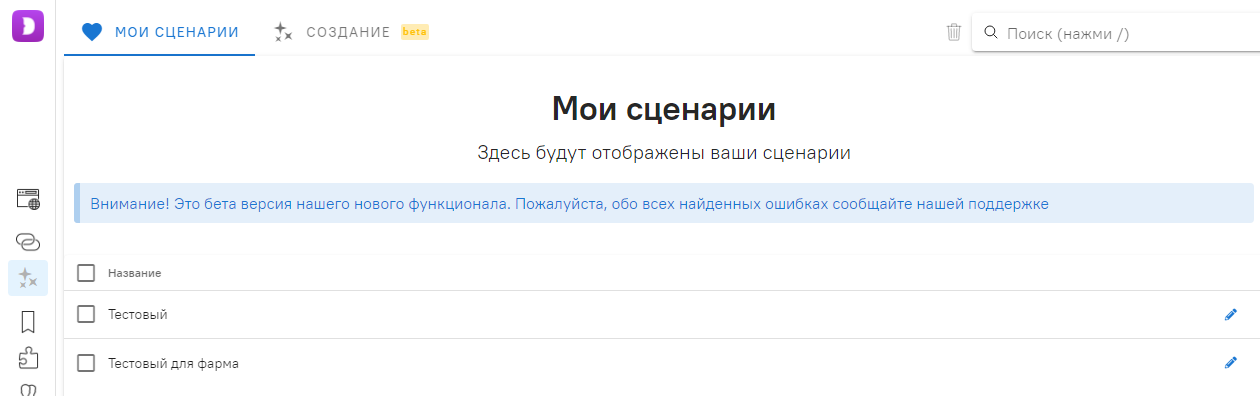
List of scenarios.
Scenario creation is moved to a separate tab.
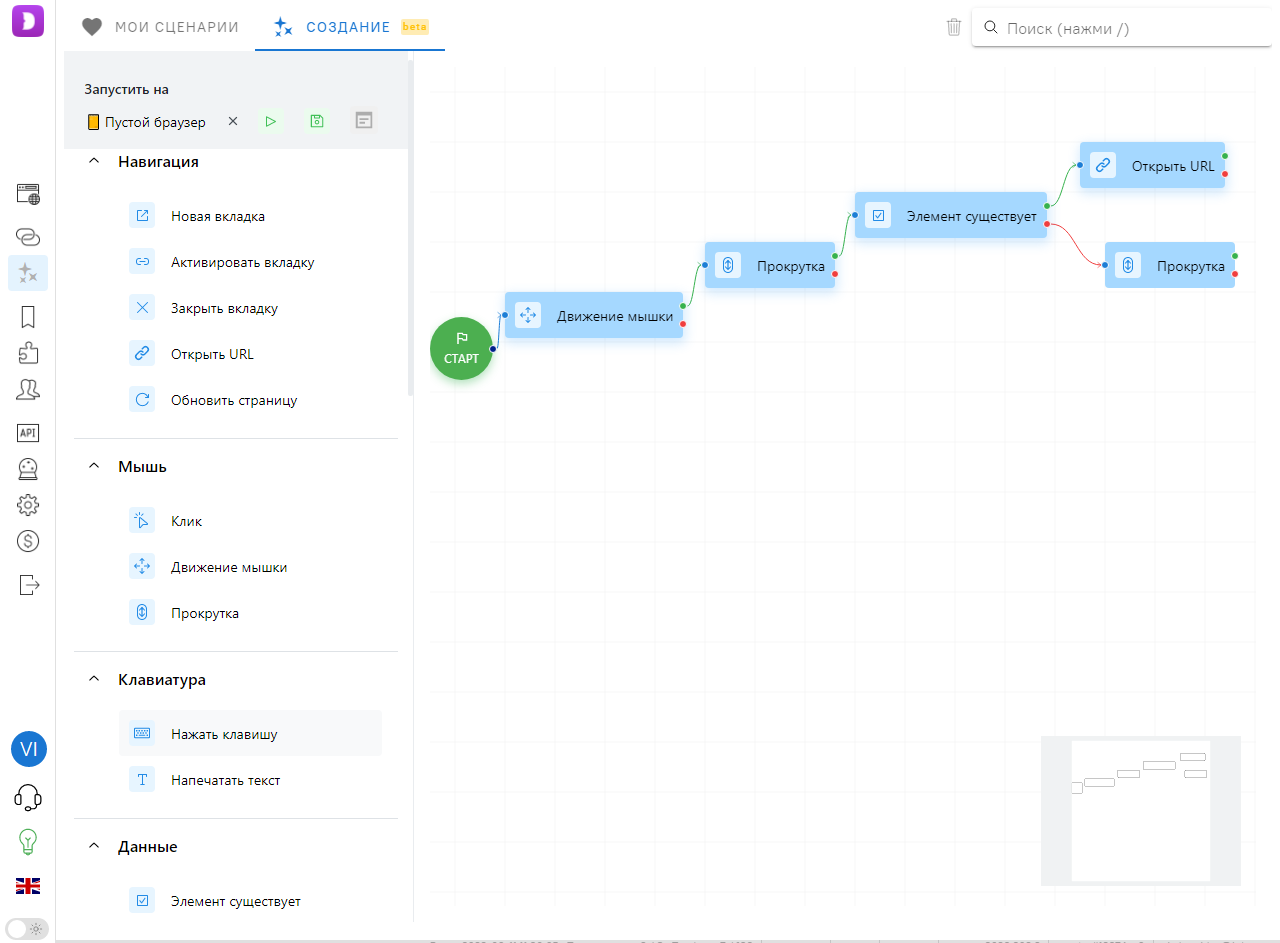
In scenarios, there is a fairly wide list of actions with tabs, mouse, and keyboard. There is even an option to add comments. To create a scenario, you need to drag and drop action buttons into the workspace and connect the first one to the start block. From the buttons, you can draw a green string that will launch the next action in case of successful execution, and a red one for failed execution.
By clicking on the action buttons, you can fill them with the necessary values, as well as delete them. For example, this is what the "Open URL" and "Mouse movement" buttons look like when clicked.
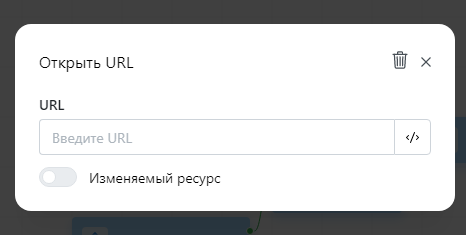
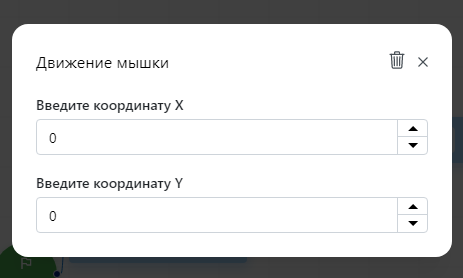
With such combinations, you can develop quite complex behavior scenarios in profiles.
After creating a scenario, you can immediately select the profile on which you want to run it. Alternatively, you can just save it to the list to share it with the required profiles later.
Bookmarks and Extensions
Here we add all the pages and browser extensions necessary for work. Then, they can be immediately attached to a profile during its creation.
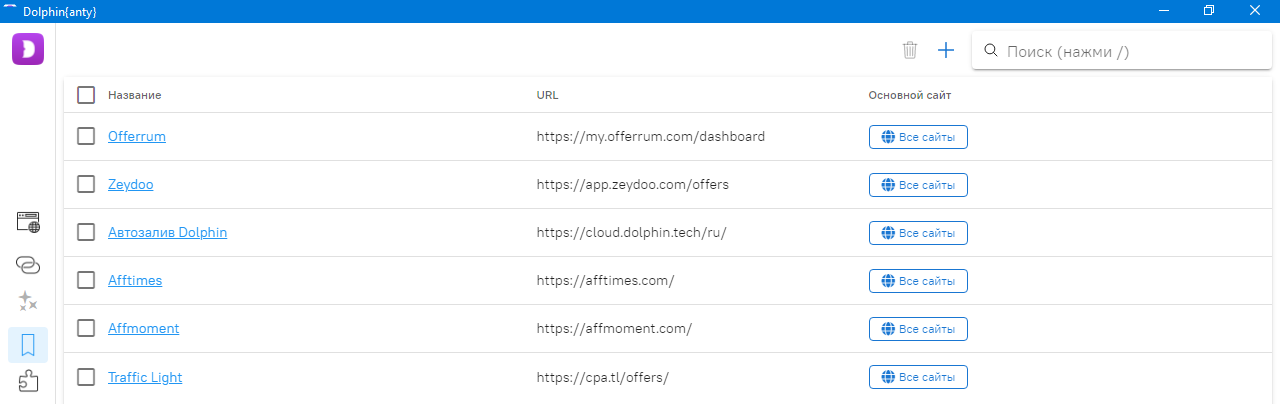
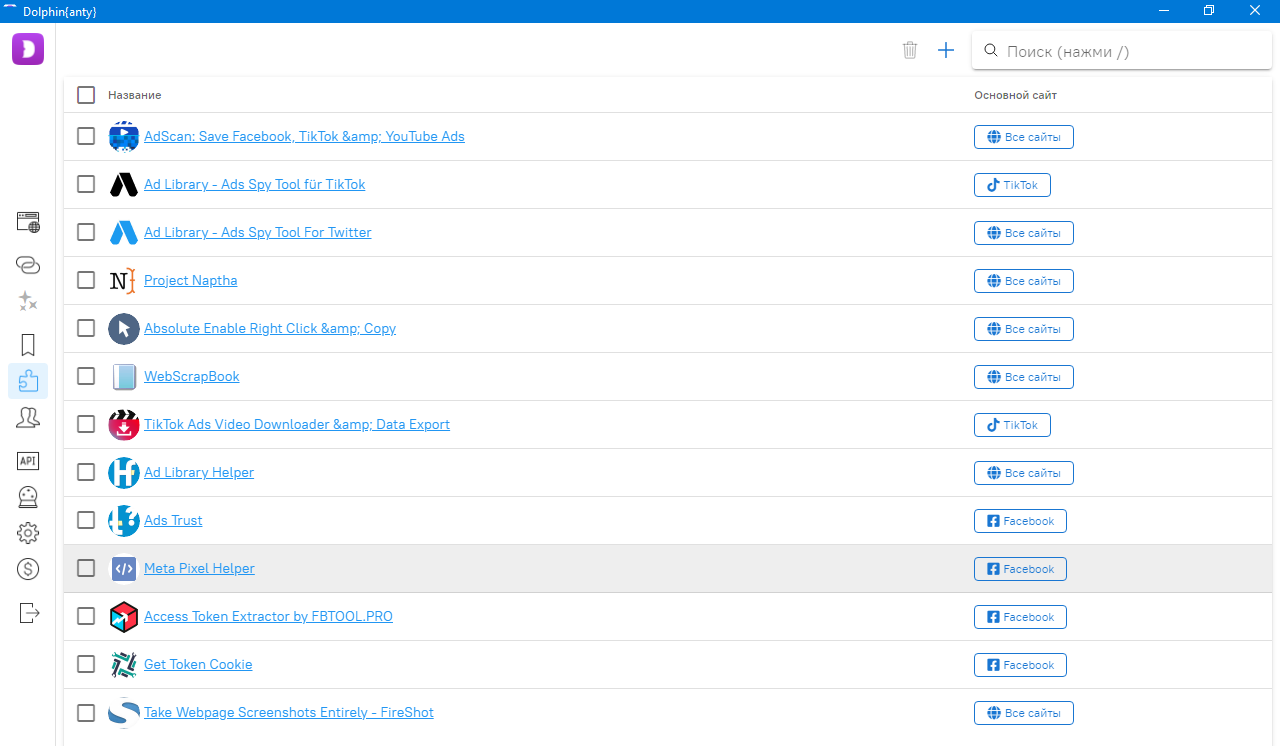
Plugins are added by pasting their link from the Chrome Web Store. When adding bookmarks and extensions, you can select the website they will be linked to. For example, Dolphin auto-uploader and Ads Trust can be linked to "Facebook". Then, when creating a browser profile for FB, this tab and extension will automatically appear in the profile.
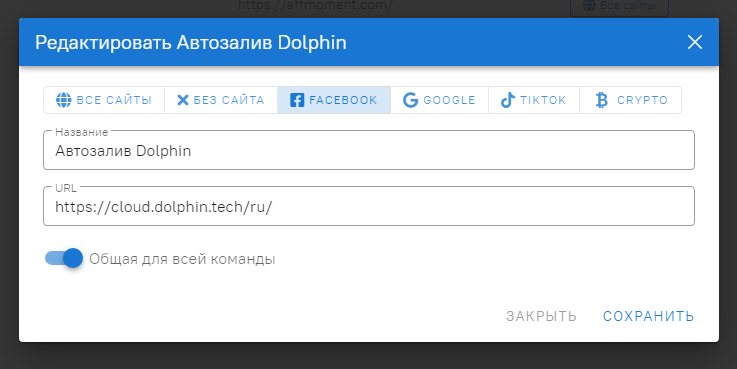
You can create a plugin and bookmark for a specific website both for yourself and for the entire team.
Users
This section contains the list of team members.
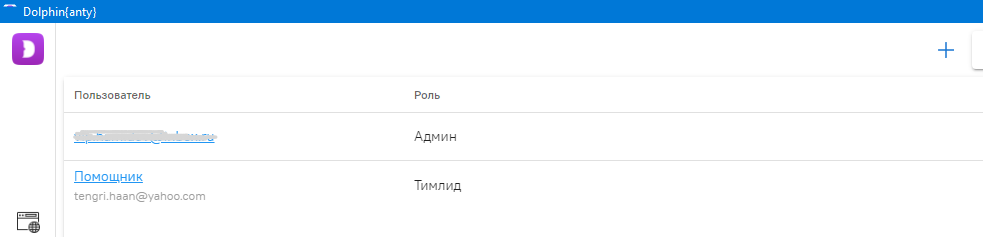
To add them, click the plus sign in the upper right, and enter the email, display name, and role.
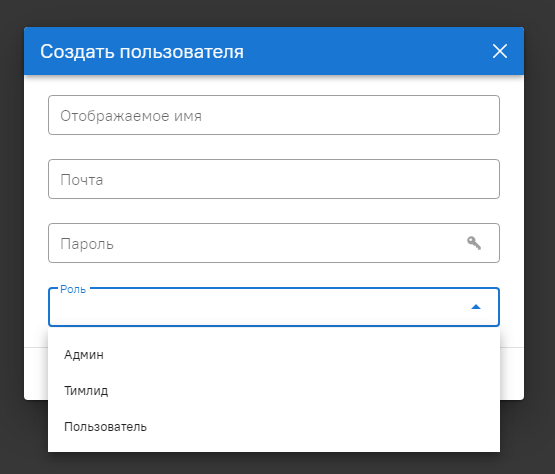
User names and roles can be changed after they are added. Once you have added a user, they become a team member, and profiles, proxies, extensions, scenarios, and other work objects can be shared with them.
Settings
In this section, you can configure access to the Dolphin.Cloud auto-uploader. Just take the access token and paste it into the top line.
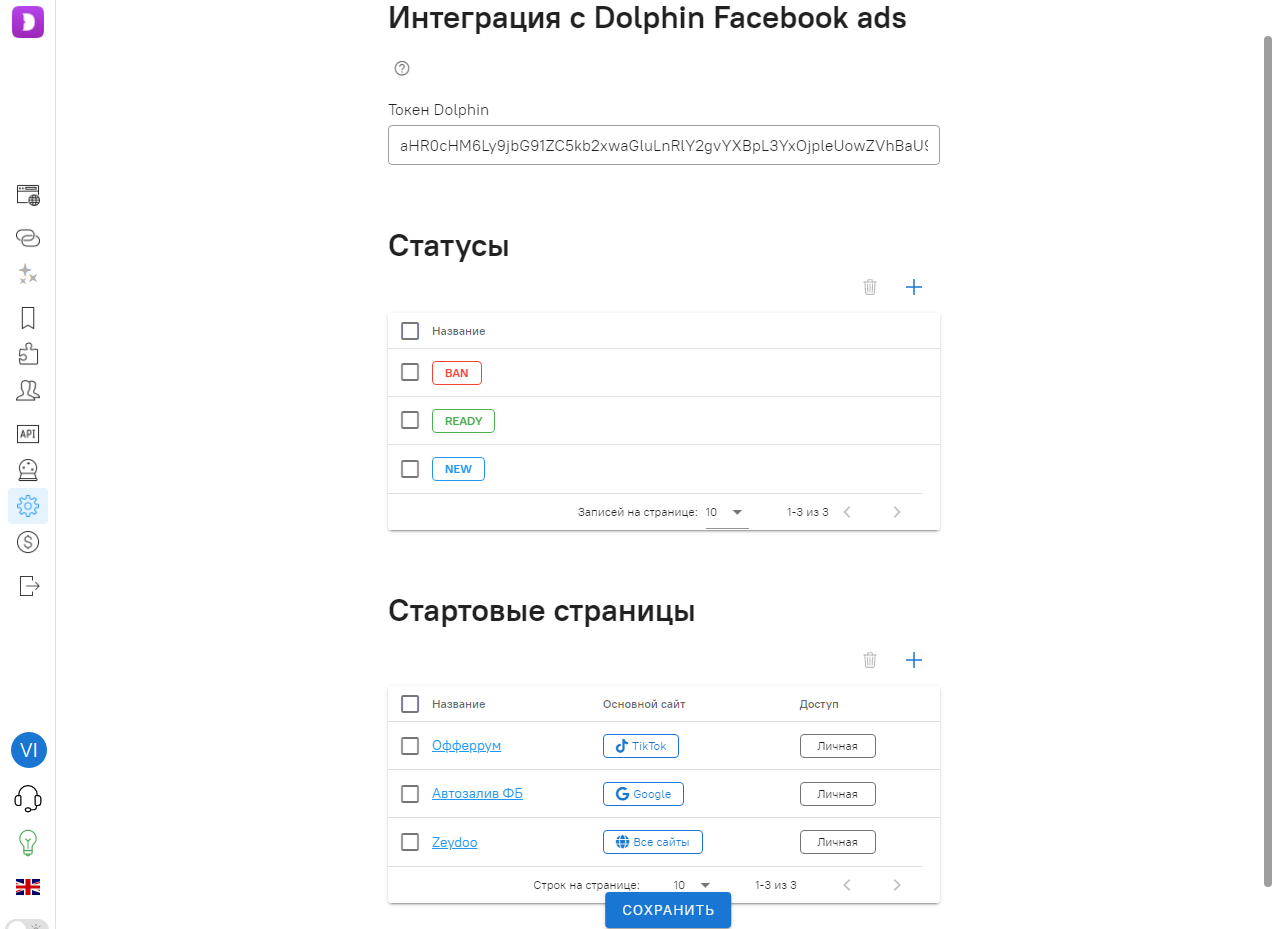
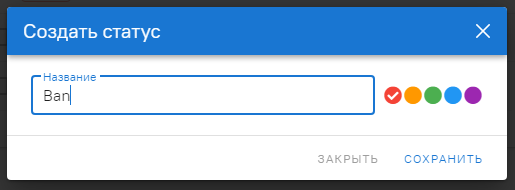
Also, here you can add statuses and configure start pages that will open when profiles are launched. By default, there are three profile statuses: New, Ready, and Ban. However, you can assign other names or colors to them, add new ones, or delete existing ones.
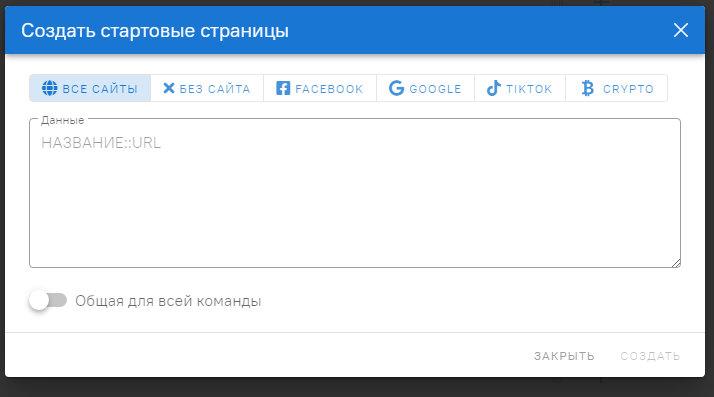
In a similar way, we create start pages: click the plus sign and paste the name along with the URL, separating them with double colons.
Below are the buttons to log out and go to the payment page. Click "Pay", and you will see the page below.
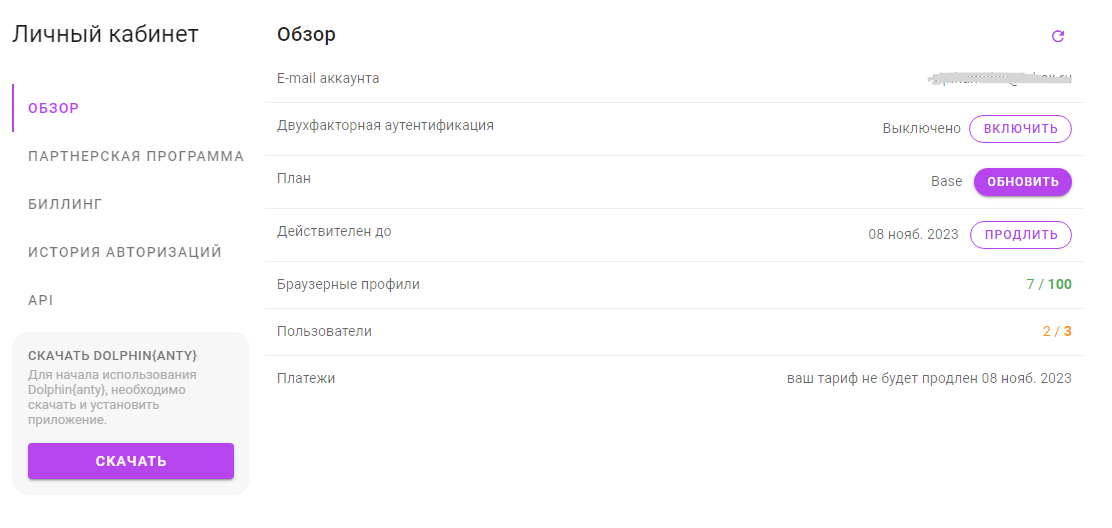
On it, you can either upgrade your plan or renew it.
The "Automation" and "API" tabs were not described above. The first one is designed to switch to the DevTools Protocol and automate profile operations via libraries like Puppeteer, Playwright, Selenium, etc. The second one allows you to configure remote API access and manage all the browser features described above. However, to work with profile automation and the API, you need to know how to program. For coding specialists, clicking these tabs opens the corresponding instructions.
Tests
The browser profile was checked via Pixelscan above. But it would be a good idea to check Dolphin Anty's fingerprints in a few more services. Let's test the uniqueness of the browser fingerprint through the AmIUnique and Cover Your Tracks services.
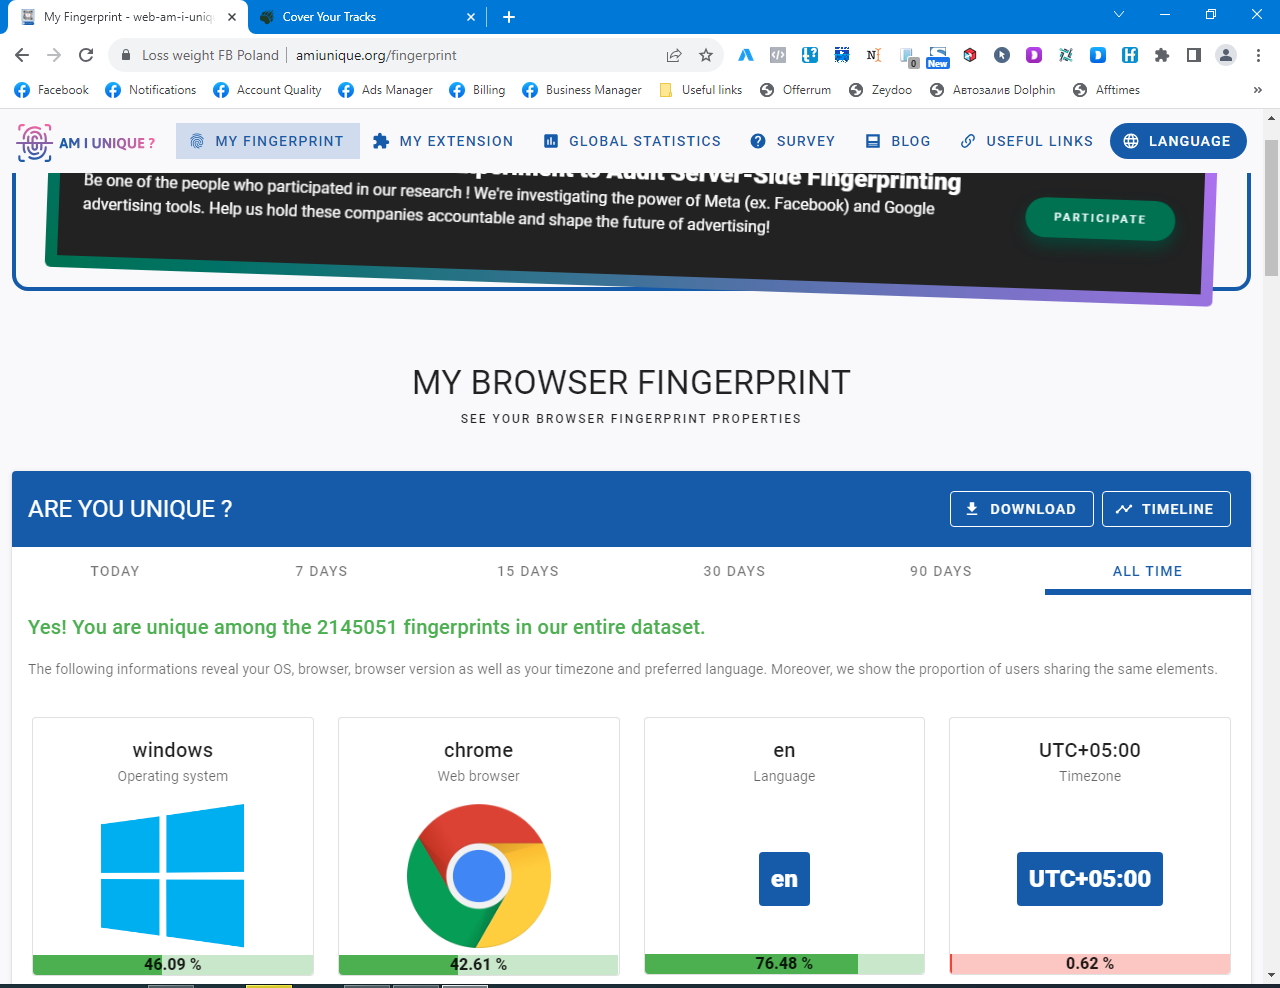
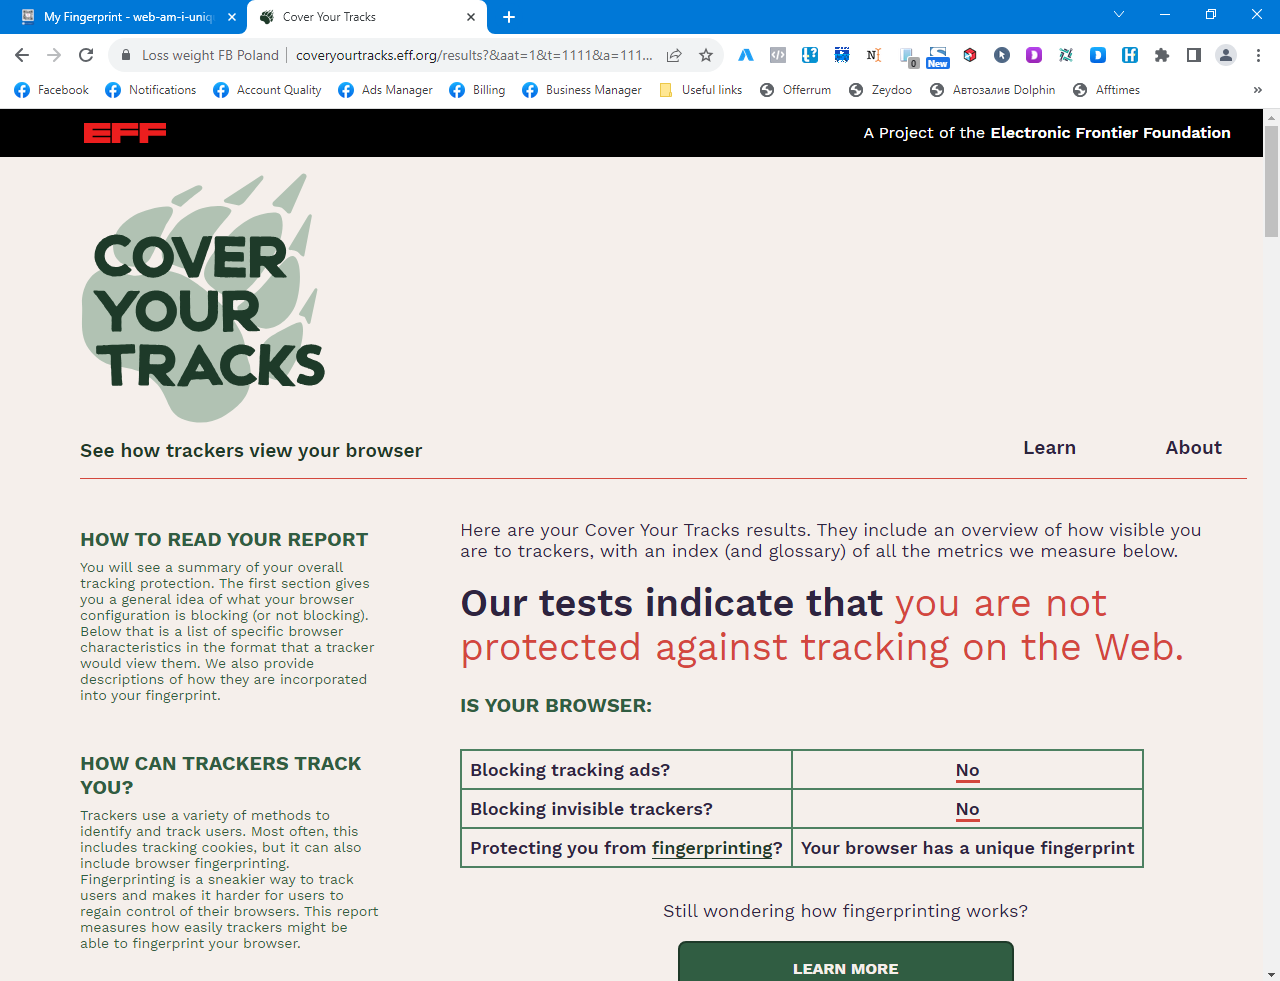
The results are good; the fingerprints are unique.
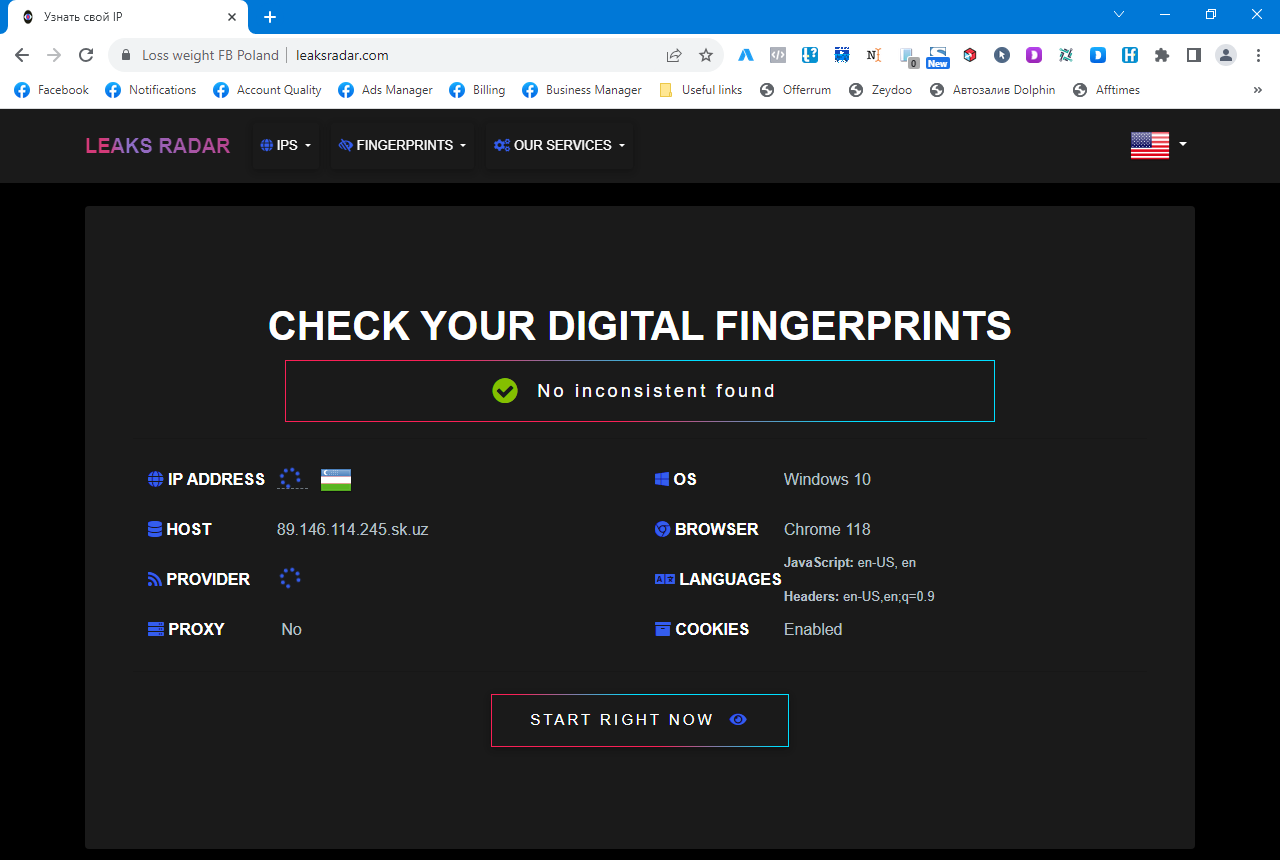
Now let's check the naturalness and trustworthiness of the browser fingerprint via Leaks Radar.